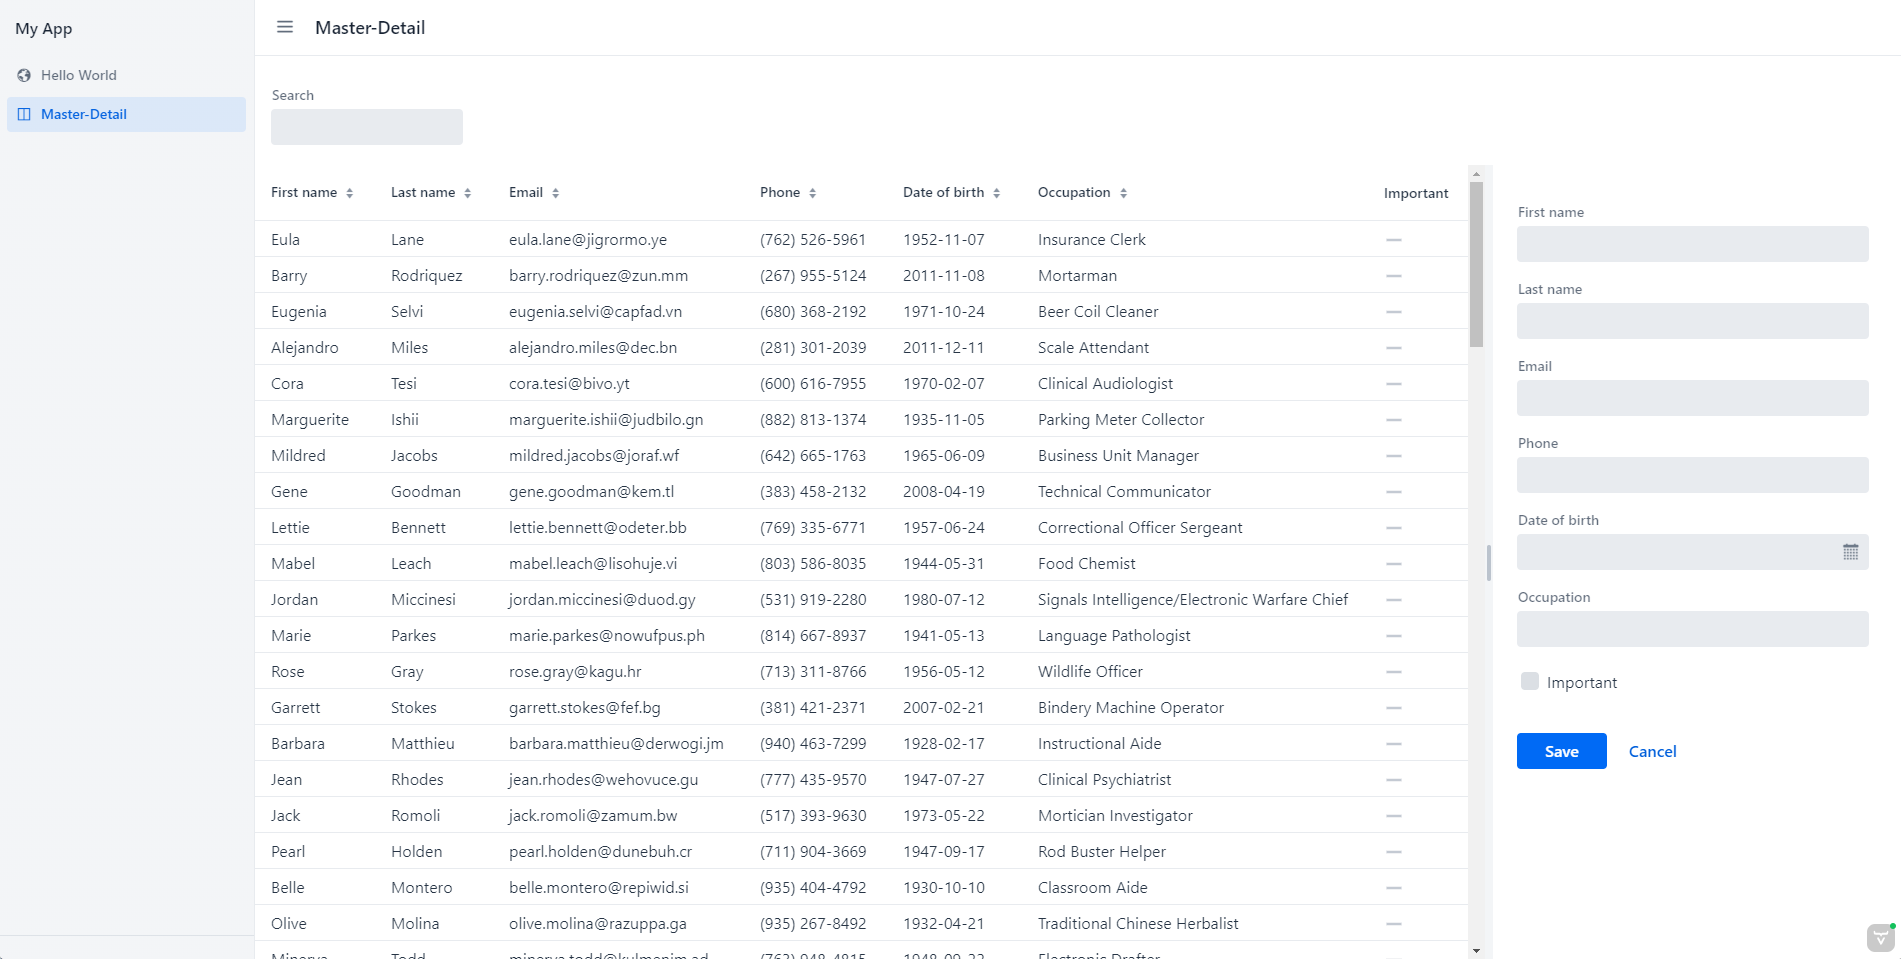
In this post, I’ll explain how to use the web application framework Hilla to create a master-detail view with a Grid to display the data and a Form to edit the data.
What is Hilla?
Hilla integrates a Spring Boot Java back end with a reactive TypeScript front end. It helps you build apps faster with type-safe server communication, including UI components, and integrated tooling.
From hilla.dev
Hilla uses TypeScript with Lit and Webcomponents in the frontend and Spring Boot in the backend. In the backend you’ll create endpoints from which the API and the TypeScript will be generated. This makes the access to the backend much easier and it’s also typesafe and compile-time-checked.
Creating a Hilla Master-Detail View
The source code is available on GitHub: https://github.com/simasch/hilla-master-detail-with-filter
There are two ways to create a new project:
Use npx:
npx @vaadin/cli init --hilla my-hilla-app
Or use start.vaadin.com. Make sure that you delete all views and add one of those

The Endpoint
The demo project uses a SamplePerson entity. This is stored in an H2 database using Spring Data JPA.
To access the data from the frontend we need to create a Hilla Endpoint:
@Endpoint
@AnonymousAllowed
public class SamplePersonEndpoint {

    private final SamplePersonRepository repository;

    @Autowired
    public SamplePersonEndpoint(SamplePersonRepository repository) {
        this.repository = repository;
    }

    @Nonnull
    public Page<@Nonnull SamplePerson> list(String filter, Pageable pageable) {
        if (filter == null || filter.equals("")) {
            return repository.findAll(pageable);
        } else {
            return repository.findAllByFirstNameLikeIgnoreCaseOrLastNameLikeIgnoreCase(
                                                   filter + "%", filter + "%", pageable);
        }
    }

    public Optional<SamplePerson> get(@Nonnull UUID id) {
        return repository.findById(id);
    }

    @Nonnull
    public SamplePerson update(@Nonnull SamplePerson entity) {
        return repository.save(entity);
    }

    public void delete(@Nonnull UUID id) {
        repository.deleteById(id);
    }

    public long count(String filter) {
        if (filter == null || filter.equals("")) {
            return repository.count();
        } else {
            return repository.countAllByFirstNameLikeIgnoreCaseOrLastNameLikeIgnoreCase(
                                                              filter + "%", filter + "%");
        }
    }

}
Hilla Endpoints are secure by default and you can use the security annotations @RolesAllowed, @PermitAll etc. But as we don’t use authentication in the simple example we have to annotate the Endpoint with @AnonymousAllowed to allow unauthenticated access.
The @Nonnull annotations are used by the TypeScript generator to define the nullability. This topic is explained in the documentation.
From this Java class TypeScript code will be generated:
// @ts-ignore
import client from './connect-client.default';
// @ts-ignore
import { Subscription } from '@hilla/frontend';

import type SamplePerson from './com/example/application/data/entity/SamplePerson';
import type Pageable from './dev/hilla/mappedtypes/Pageable';

function _count(
 filter: string | undefined
): Promise<number>
{
 return client.call('SamplePersonEndpoint', 'count', {filter});
}

function _delete(
 id: string
): Promise<void>
{
 return client.call('SamplePersonEndpoint', 'delete', {id});
}

function _get(
 id: string
): Promise<SamplePerson | undefined>
{
 return client.call('SamplePersonEndpoint', 'get', {id});
}

function _list(
 filter: string | undefined,
 pageable: Pageable | undefined
): Promise<Array<SamplePerson | undefined>>
{
 return client.call('SamplePersonEndpoint', 'list', {filter, pageable});
}

function _update(
 entity: SamplePerson
): Promise<SamplePerson>
{
 return client.call('SamplePersonEndpoint', 'update', {entity});
}
export {
  _count as count,
  _delete as delete,
  _get as get,
  _list as list,
  _update as update,
};
As you can see all methods from the Endpoint are available and calling the backend will be very simple:
const data = await SamplePersonEndpoint.list(
                   this.filter, {pageNumber: params.page, pageSize: params.pageSize, sort});
As you can imagine changing the Endpoint on the Java side will result in changing the generated TypeScript code and you’ll get compiler errors if there are breaking changes.
The Entity
For simplicity, we directly use the JPA Entity in the Endpoint. We also use annotations to define nullability and looking at the email property also some validation.
@Entity
public class SamplePerson extends AbstractEntity {

    @Nonnull
    private String firstName;
    @Nonnull
    private String lastName;
    @Email
    @Nonnull
    private String email;
    @Nonnull
    private String phone;
    private LocalDate dateOfBirth;
    @Nonnull
    private String occupation;
    @Nonnull
    private boolean important;

...
}
This entity will result in two TypeScript types generated by Hilla.
export default interface SamplePerson extends AbstractEntity {
  firstName: string;
  lastName: string;
  email: string;
  phone: string;
  dateOfBirth?: string;
  occupation: string;
  important: boolean;
}
export default class SamplePersonModel<T extends SamplePerson = SamplePerson> extends AbstractEntityModel<T> {
  static createEmptyValue: () => SamplePerson;

  get firstName(): StringModel {
    return this[_getPropertyModel]('firstName', StringModel, [false]);
  }

  get lastName(): StringModel {
    return this[_getPropertyModel]('lastName', StringModel, [false]);
  }

  get email(): StringModel {
    return this[_getPropertyModel]('email', StringModel, [false, new Email()]);
  }

  get phone(): StringModel {
    return this[_getPropertyModel]('phone', StringModel, [false]);
  }

  get dateOfBirth(): StringModel {
    return this[_getPropertyModel]('dateOfBirth', StringModel, [true]);
  }

  get occupation(): StringModel {
    return this[_getPropertyModel]('occupation', StringModel, [false]);
  }

  get important(): BooleanModel {
    return this[_getPropertyModel]('important', BooleanModel, [false]);
  }
}
The SamplePerson interface is used by our code and SamplePersonModel will be used for form binding.
The View with the Grid
To create the view we use Lit. Also the View will be a Webcomponent. You’ll find the full source code here.
@customElement('master-detail-view')
export class MasterDetailView extends View {
The customElement decorator defines the name of the Webcomponent and we extend from a Hilla class View that finally extends LitElement.
The most important method is render where we create the content of the view.
 render() {
        return html`
            <vaadin-vertical-layout theme="padding">
                <vaadin-text-field label="Search" @value-changed=${this.search}></vaadin-text-field>
            </vaadin-vertical-layout>

            <vaadin-split-layout>
                <div class="grid-wrapper" style="width: 70%">
                    <vaadin-grid
                            id="grid"
                            theme="no-border"
                            .size=${this.gridSize}
                            .dataProvider=${this.gridDataProvider}
                            @active-item-changed=${this.itemSelected}
                            .selectedItems=${[personStore.selectedPerson]}
                    >
                        <vaadin-grid-sort-column path="firstName" auto-width></vaadin-grid-sort-column>
                        <vaadin-grid-sort-column path="lastName" auto-width></vaadin-grid-sort-column>
                        <vaadin-grid-sort-column path="email" auto-width></vaadin-grid-sort-column>
                        <vaadin-grid-sort-column path="phone" auto-width></vaadin-grid-sort-column>
                        <vaadin-grid-sort-column path="dateOfBirth" auto-width></vaadin-grid-sort-column>
                        <vaadin-grid-sort-column path="occupation" auto-width></vaadin-grid-sort-column>
                        <vaadin-grid-column
                                path="important"
                                auto-width
                                ${columnBodyRenderer<SamplePerson>((item) =>
                                        item.important
                                                ? html`
                                                    <vaadin-icon
                                                            icon="vaadin:check"
                                                            style="width: var(--lumo-icon-size-s); height: var(--lumo-icon-size-s); color: var(--lumo-primary-text-color);"
                                                    >
                                                    </vaadin-icon>`
                                                : html`
                                                    <vaadin-icon
                                                            icon="vaadin:minus"
                                                            style="width: var(--lumo-icon-size-s); height: var(--lumo-icon-size-s); color: var(--lumo-disabled-text-color);"
                                                    >
                                                    </vaadin-icon>`
                                )}
                        ></vaadin-grid-column>
                    </vaadin-grid>
                </div>
                <person-form
                        style="width: 30%"
                        @contact-form-saved=${this.contactFormSave}
                ></person-form>
            </vaadin-split-layout>
        `;
    }
We use Vaadin components and for people familiar with the Vaadin framework it will be easy to get started.
The View uses a Grid to display the persons and uses lazy loading with a DataProvider. Therefore we define a property size that will get the number of persons from the Endpoint:
this.gridSize = (await SamplePersonEndpoint.count(this.filter)) ?? 0;
And to load the data we have to use the GridDataProvider functionality that also uses the appropriate Endpoint method that provides paging:
    private async getGridData(
        params: GridDataProviderParams<SamplePerson>,
        callback: GridDataProviderCallback<SamplePerson | undefined>
    ) {
        const sort: Sort = {
            orders: params.sortOrders.map((order) => ({
                property: order.path,
                direction: order.direction == 'asc' ? Direction.ASC : Direction.DESC,
                ignoreCase: false,
            })),
        };
        const data = await SamplePersonEndpoint.list(this.filter,
                                                {pageNumber: params.page, pageSize: params.pageSize, sort});
        callback(data);
    }
The Form
To edit the person data I’ve created a separate component. This makes the code more readable.
To bind the SamplePerson object to the form we use a binder. A binder controls all aspects of a single form. It is typically used to get and set the form value, access the form model, validate, reset, and submit the form.
The binder is typed by the generated interface and class based on the Java SamplePerson class.
@customElement('person-form')
export class PersonForm extends View {

    private binder = new Binder<SamplePerson, SamplePersonModel>(this, SamplePersonModel);

    constructor() {
        super();
        this.autorun(() => {
            if (personStore.selectedPerson) {
                this.binder.read(personStore.selectedPerson);
            } else {
                this.binder.clear();
            }
        });
    }
But how do we get the person that is selected in the Grid to the form?
This can be solved by a store that holds the currently selected person.
Hilla recommends MobX to manage frontend state. Read more about that in the documentation: https://hilla.dev/docs/application/state-management#using-a-store
Also in the form we use Vaadin components that allows us to bind the fields: ${field(this.binder.model.firstName)}
 render() {
        return html`
            <div class="editor-layout">
                <div class="editor">
                    <vaadin-form-layout>
                        <vaadin-text-field
                                label="First name"
                                id="firstName"
                                ${field(this.binder.model.firstName)}
                        ></vaadin-text-field>
...
Submitting the Form
The last thing we want to have a look at is how to save the person in the form.
We can use the binders submitTo method and pass the update method of the Endpoint.
 private async save() {
        try {
            await this.binder.submitTo(SamplePersonEndpoint.update);
            this.binder.clear();

            personStore.selectedPerson = null;

            this.dispatchEvent(new CustomEvent('contact-form-saved'));

            Notification.show(`SamplePerson details stored.`, {position: 'bottom-start'});
        } catch (error: any) {
            if (error instanceof EndpointError) {
                Notification.show(`Server error. ${error.message}`, {theme: 'error', position: 'bottom-start'});
            } else {
                throw error;
            }
        }
    }
After saving we clear the store and dispatch an event contact-form-saved. This event will be used in the grid to refresh the grid with the changed data.
<person-form @contact-form-saved=${this.contactFormSave}></person-form>
Conclusion: Building a Full-Stack App with Hilla
Of course, this was only a superficial introduction to Hilla. But I hope this article gave you an overview of how to easily develop a data-centric full-stack application with a lazy loading grid.
If you’re interested in how Hilla compares to Vaadin check out my video: